
Intro III - Honeybee Interface
Honeybee Interface
The Honeybee interface arranges components by simulation type. Section 00 is primarily for defining zone geometry in energy simulations. 
Section 02-04 are for daylighting. We will not use them in this tutorial. 
Seciton 05-10 are for energy modeling in Energy+. They are the focus of this tutorial. 
Section 11 components are for conduction simulations in THERM. We will not use them in this tutorial. 
Section 12 components update Honeybee, and Section 13 components are experimental or under development. 
As an example of how these groupings work, take the current tutorial on single-zone energy simulations through Energy+. It only uses components from Primary Section 00, the Energy Sections 05, 06, 07, 08, 09, 10, and Update Section 12. It does not use any components from sections 02-04 on daylighting, or Section 11 on THERM. 
Locating Components in Honeybee
Creating a Honeybee Definition
iii.00 The first step for creating any Honeybee script is always to place the Honeybee component on the grasshopper canvas. This is important because this component contains several internal libraries that are necessary for nearly all other Honeybee components to function. Unlike most grasshopper scripts, it is not necessary to connect a wire between the Honeybee component and other components, simply placing it in the Grasshopper canvas activates the libraries. It is located on the 0 Honeybee | Honeybee tab, and dragging the Honeybee component onto the canvas is known as 'letting Honeybee fly'. 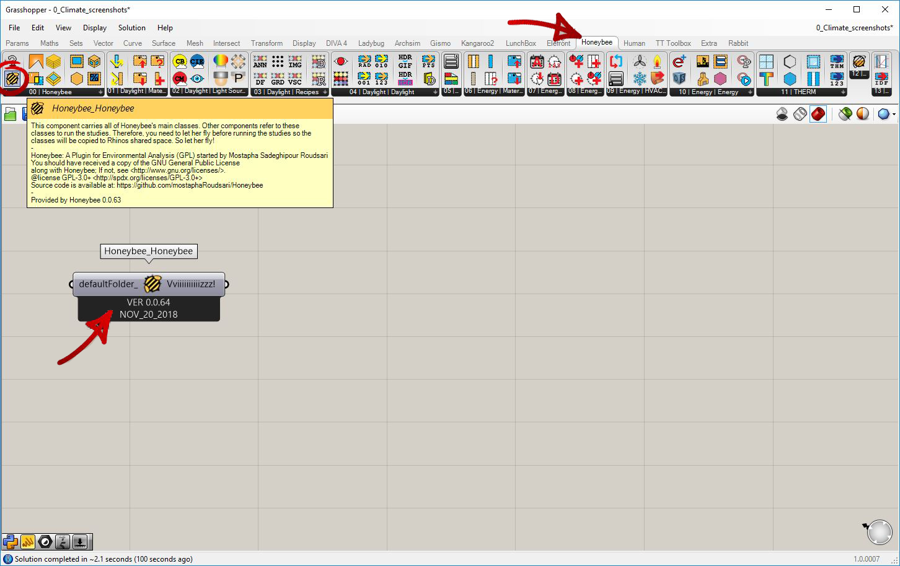
iii.01 Many Honeybee components work in tandem with Ladybug components, so we will almost always need to let Ladybug fly too. Find the Ladybug Tab and look in Section 0 for the Ladybug component, and drag it onto the canvas. 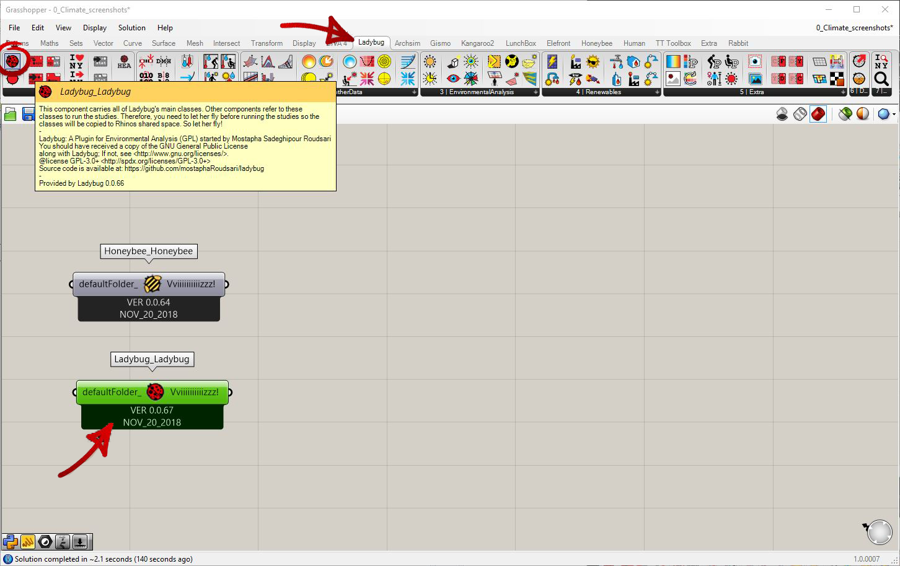
iii.02 The next crucial step before we begin creating a simulation is to be sure that we have climate data upon which the simulation will be based. This requires an internet connection. To get started, find Ladybug Section 0 and drag Ladybug's Open EPW and STAT Weather File component to the canvas. 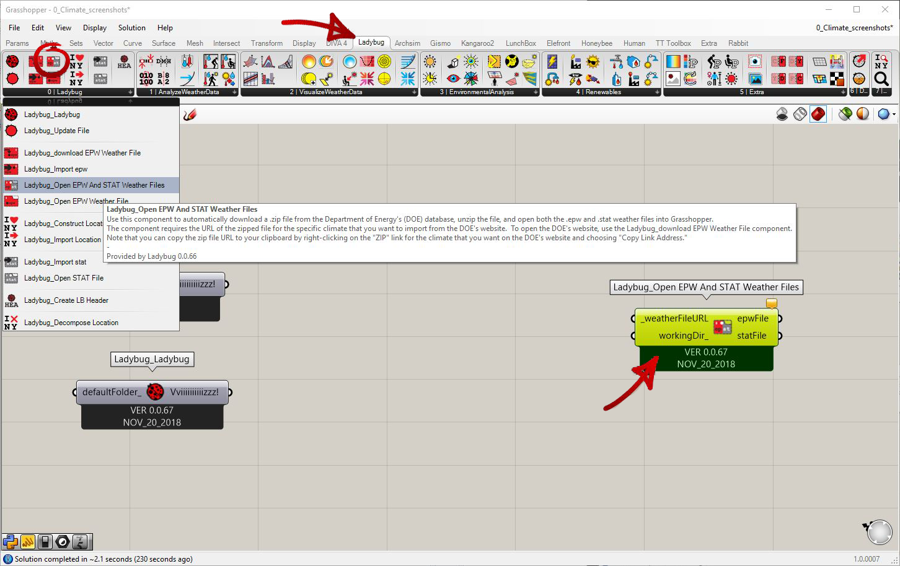
iii.03 This component will automatically downloas climate data from the internet once we provide it with a URL internet address. We will use a panel component to type the address into, so drag a panel onto the Grashopper canvas. 
 Tip on panels: We will use panels to enter information frequently. Rather than dragging a panel into the canvas each time, simply double-click on the canvas and type '//' followed by the data you wish to enter into the panel.
iii.05 Connect the panel containing the weather file URL to the _weatherFileURL input of the Open EPW and STAT Weather Files component. You should notice that the Open EWP and STAT Weather Files component has turned from orange to grey, indicating that it has collected data without errors. 
iii.06 If you connect a panel to the epwFile output of Open EPW and STAT Weather Files component, and hover over the 'epwFile' text, you will see that Ladybug has downloaded an EPW file and saved it on your local drive. The default location is here: c:\ladybug 
iii.07 This weather data can now be used for any number of simulations. We will wrap up this tutorial by showing how to explore the data that you've just imported. Start by pulling a Ladybug_Import EPW component onto the canvas. 

iii.09 The Ladybug_Import EPW component should now change from orange to grey, indicating data was collected without errors. 
iii.10 We now have access to many types of data contained in the EPW File, lets connect panels to the first four inputs and take a closer look at the information that is now available to us. 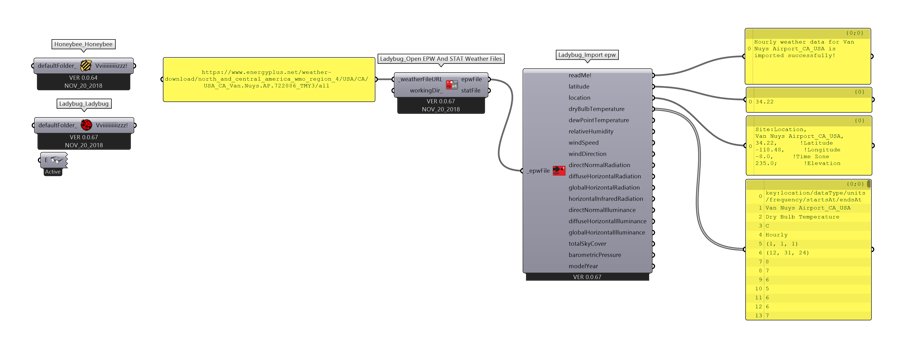
iii.11 The readme output provides useful information on whether the component worked correctly. This is particularly important if the component is orange, which indicates that there was an error.  Note how disconnecting the URL address we entered earlier affects this ouput:
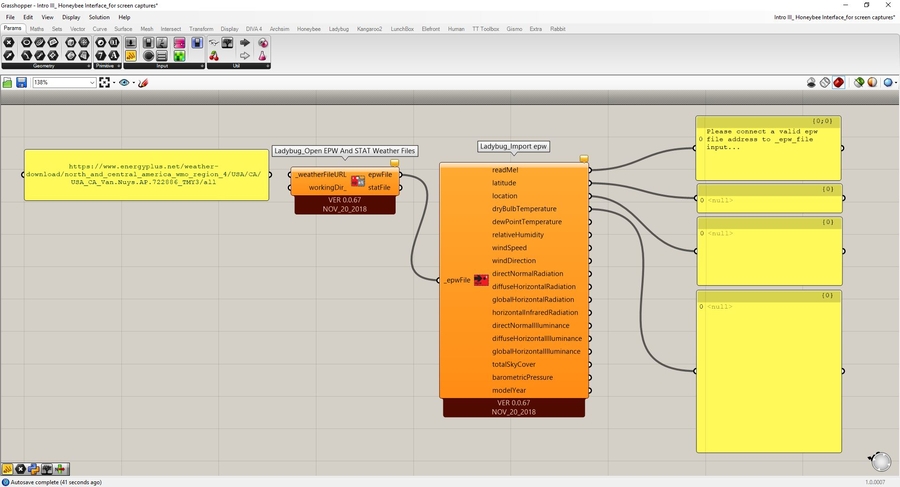
iii.12 The latitude will provide the latitude at which the data was collected. This is extremely important for confirming that accuracy of solar geometry. 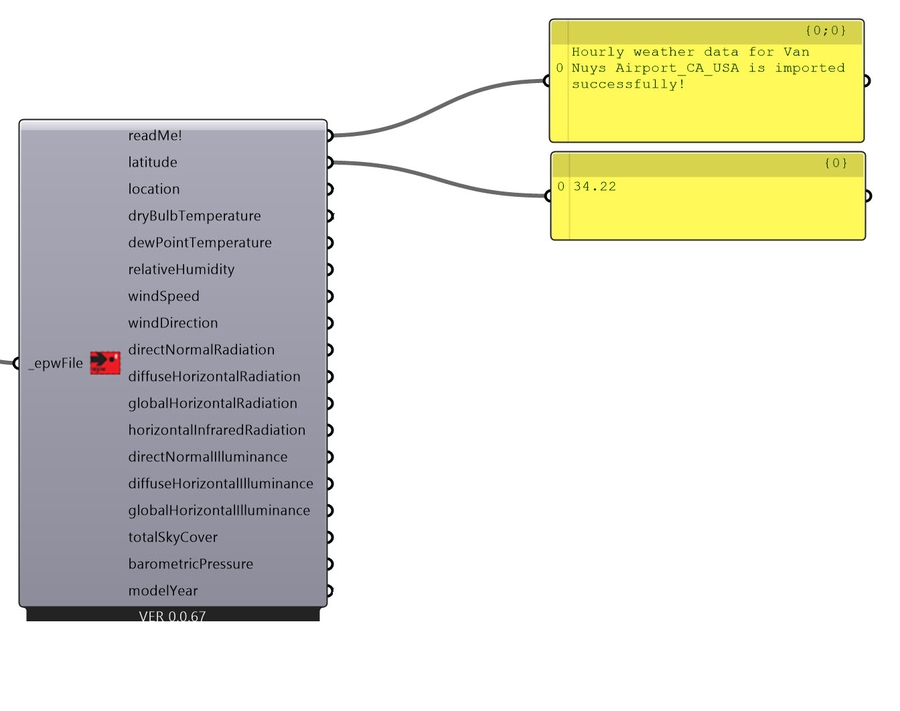
iii.13 The next output provides more information bout the location such as the name of the location, latitude, longitude, timezone, and elevation. The timezone is expressed by the number of hours difference from Greenwhich, UK. Positive values are east, negative values are west. The elevation is in meters. 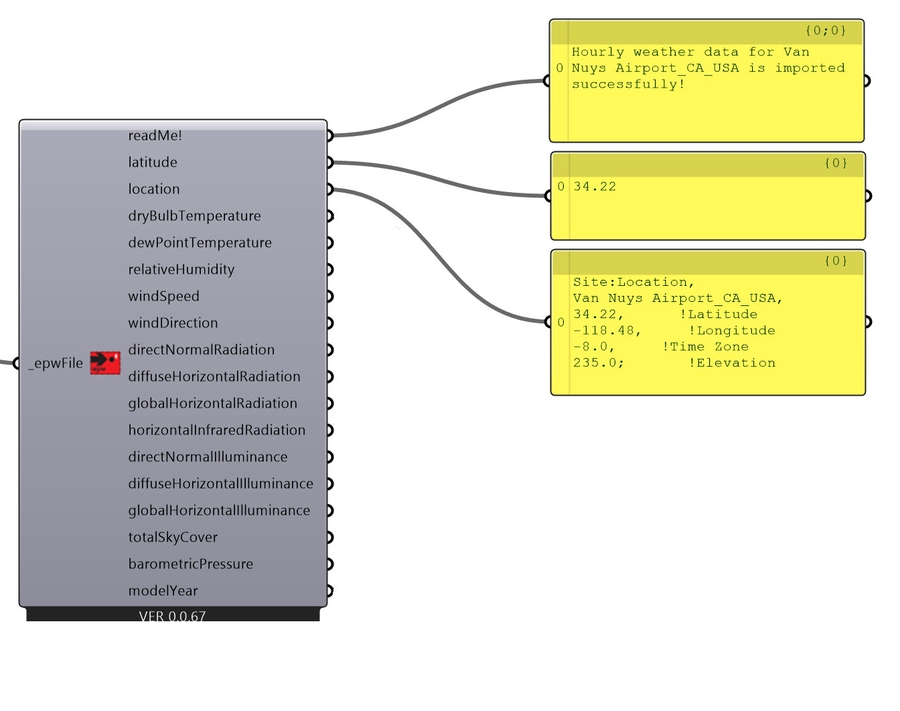
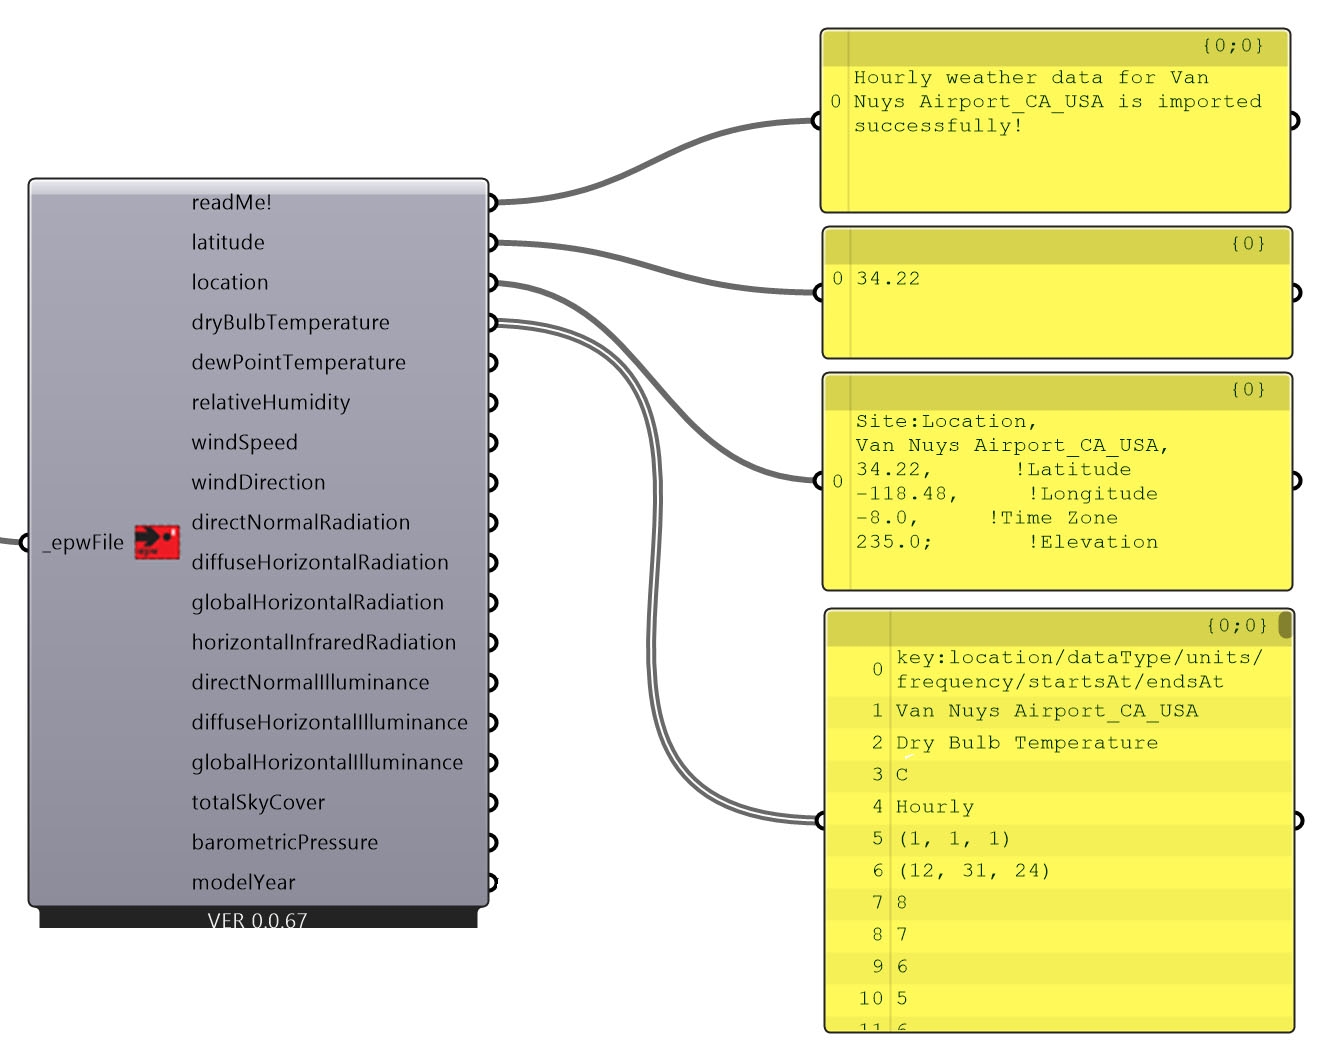
iii.15 Try scrolling through all 8760 values by dragging the dark yellow scroll-bar (marked by a red dot below). 
iii.16 Finally, we will drag a Ladybug_Sunpath component onto the canvas to explain a few important conventions and to show how you can use the Ladybug and Honeybee interface to learn about the components available to you. The sunpath component creates geometry that shows the movement of the sun over the course of an entire year. 
iii.17 Observe that some of the inputs for the sunpath component are preceded by an underscore, and others have a trailing underscore. For example, the first input terminal is labelled 'north_', whereas the second is labeled '_location'. This is a convention used throughout Ladybug and Honeybee to distinguish necessary inputs from optional inputs. If a necessary input is left empty, the component will not run. Notice that even though the sunpath component is on the Grasshopper canvas, nothing appears in Rhino's modeling space. 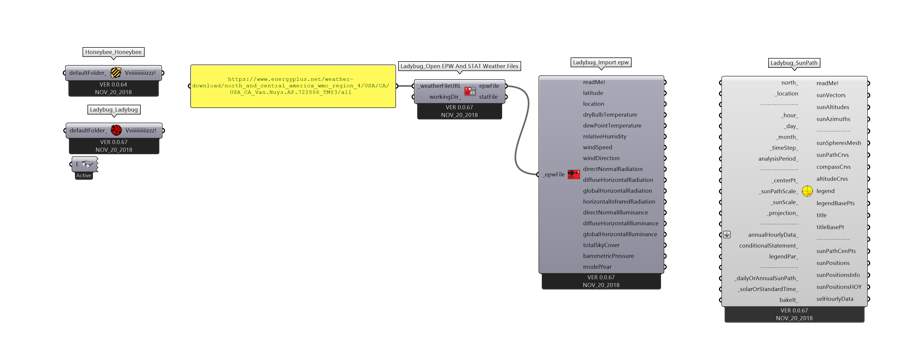
iii.18 Once we connect the location output of the Ladybug_Import EPW component to the location input of the Ladybug_SunPath component, there is enough information for the Ladybug_SunPath component to run. 
iii.19 You should now see something like this in your Rhino modelling space. Be aware that the default scale of this diagram is 400 Rhino units wide, and it will be located at 0,0,0 so you may need to zoom in or out to see it. 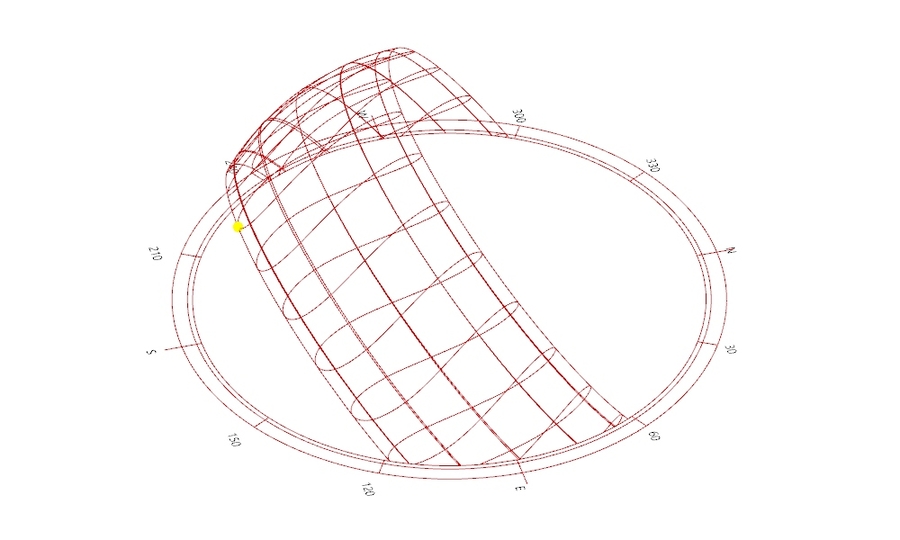
Here is what you will see when hovering over the location input:  Here is what you will see when hovering over the center of the sunpath component, which applies to the entire component:
  Finally, hovering over one of the outputs:
iii.22 The sequence in which components run on Grasshopper canvas is also important to mention. Grasshopper components usually run in the sequence that they are placed and connected to each other on the canvas. So ordinarily components would run in the following sequence: 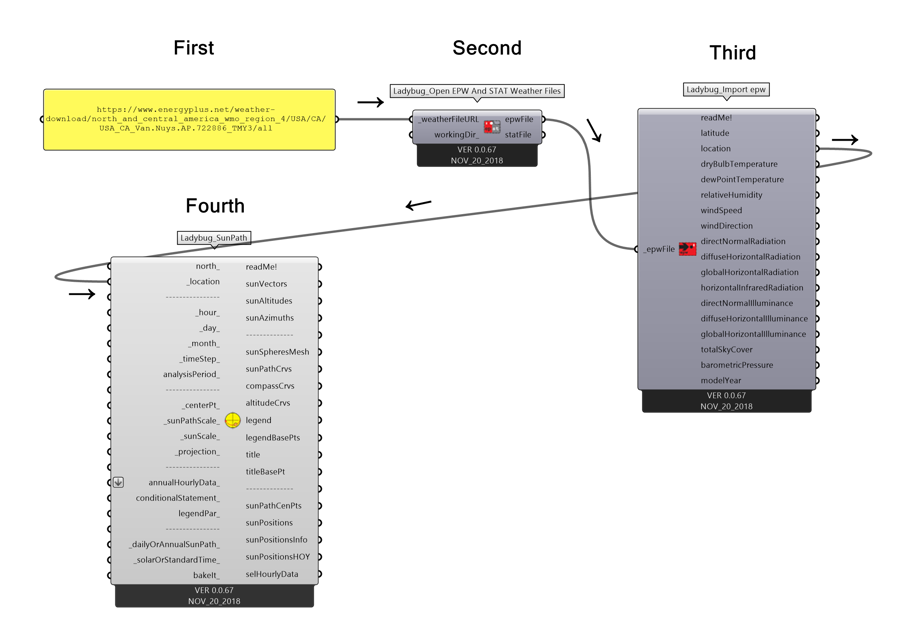
However, the LadybugLadybug and Honeybee_Honeybee components _always run first. This is good, because it means that data, functions, and libraries contained in those two components are made accessible to all the others that run afterwards. This is true even if a wire is not connected. So, the true order of calculation is below: 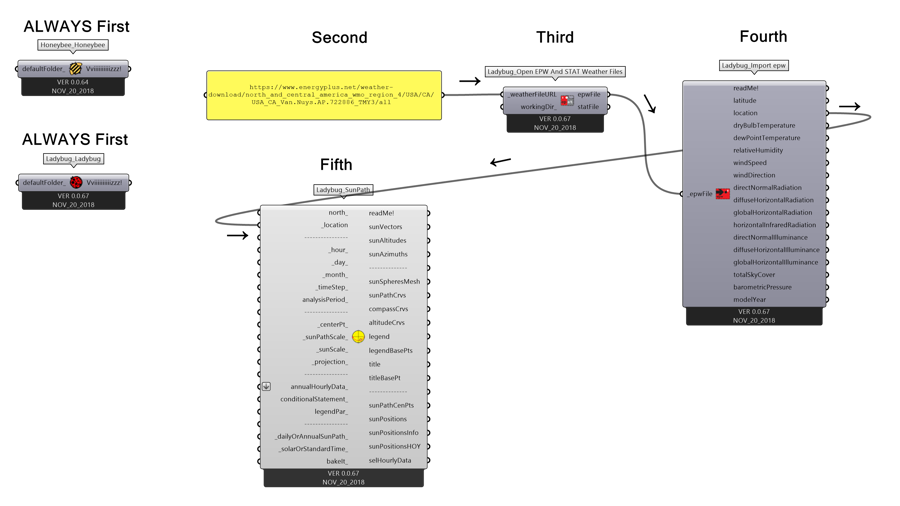
Last updated
Was this helpful?