
Step 1 - Assign Properties to Zones
This is an overview of the entire script we will create for a Single Zone Energy Model. This step on Assigning Zone Default Properties covers the portion highlighted in red. If you are following along, be certain that you let Honeybee and Ladybug fly, as covered in Intro III and as visible at the very left of the diagram below.
 Zooming in and reading from left to right, observe that first we will create components that contain the geometry. The geometry is then used to create zones with a default set of properties. Then, the windows are added as children to those zones.
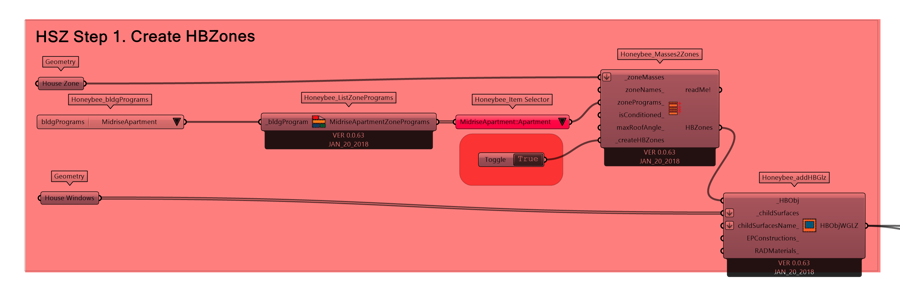
Step-by-step
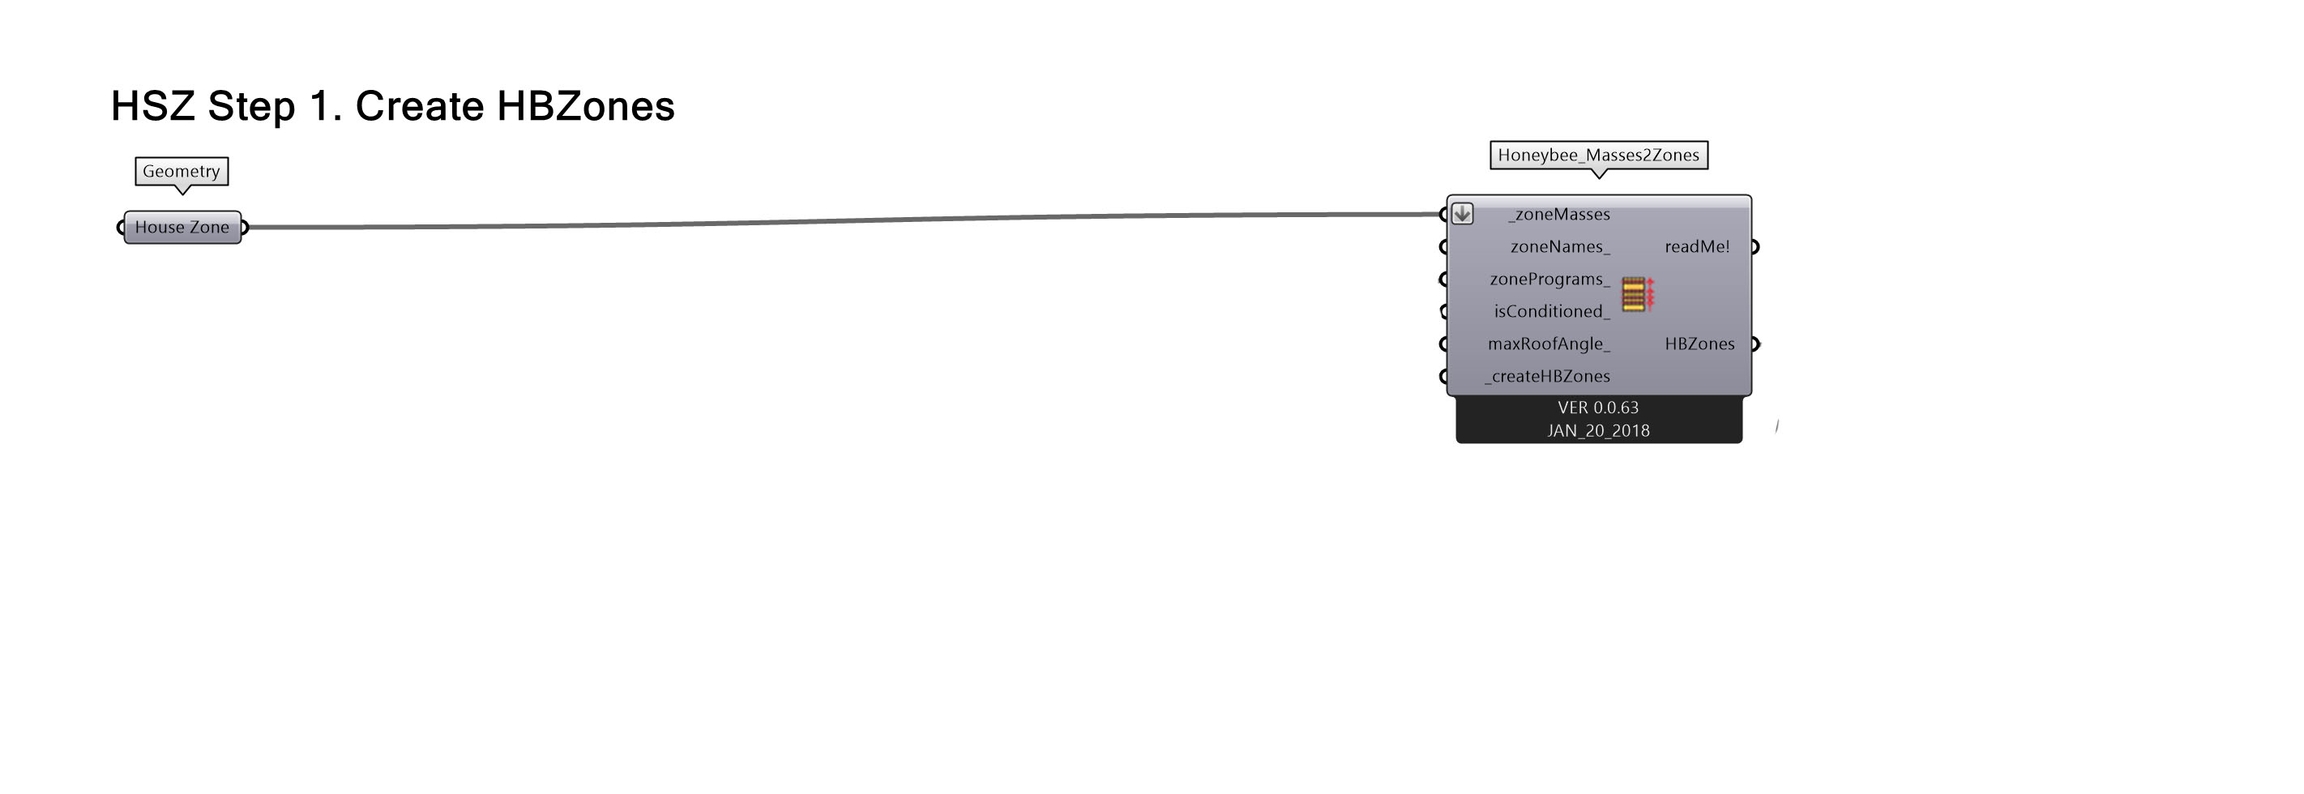
1.00 First we create a geometry component, and rename it House Zone (refer to ii.05 if you are unsure how to create components and rename them). We then place the zone geometry constructed according to the guidelines in Step 1 into this component. 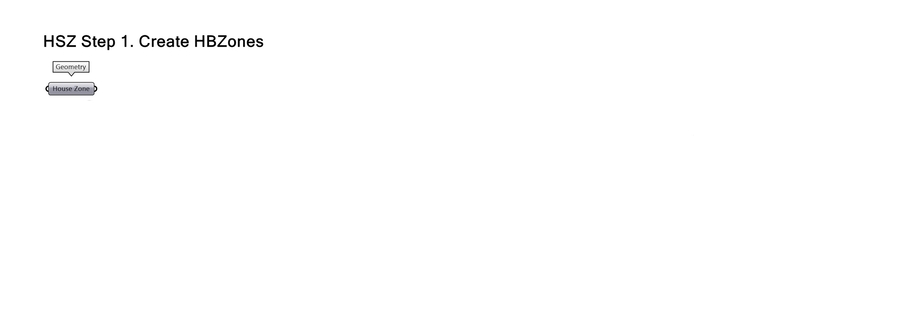
Here is an image of the zone which is loaded into this Geometry component, overlayed on top of the model context it represents. 
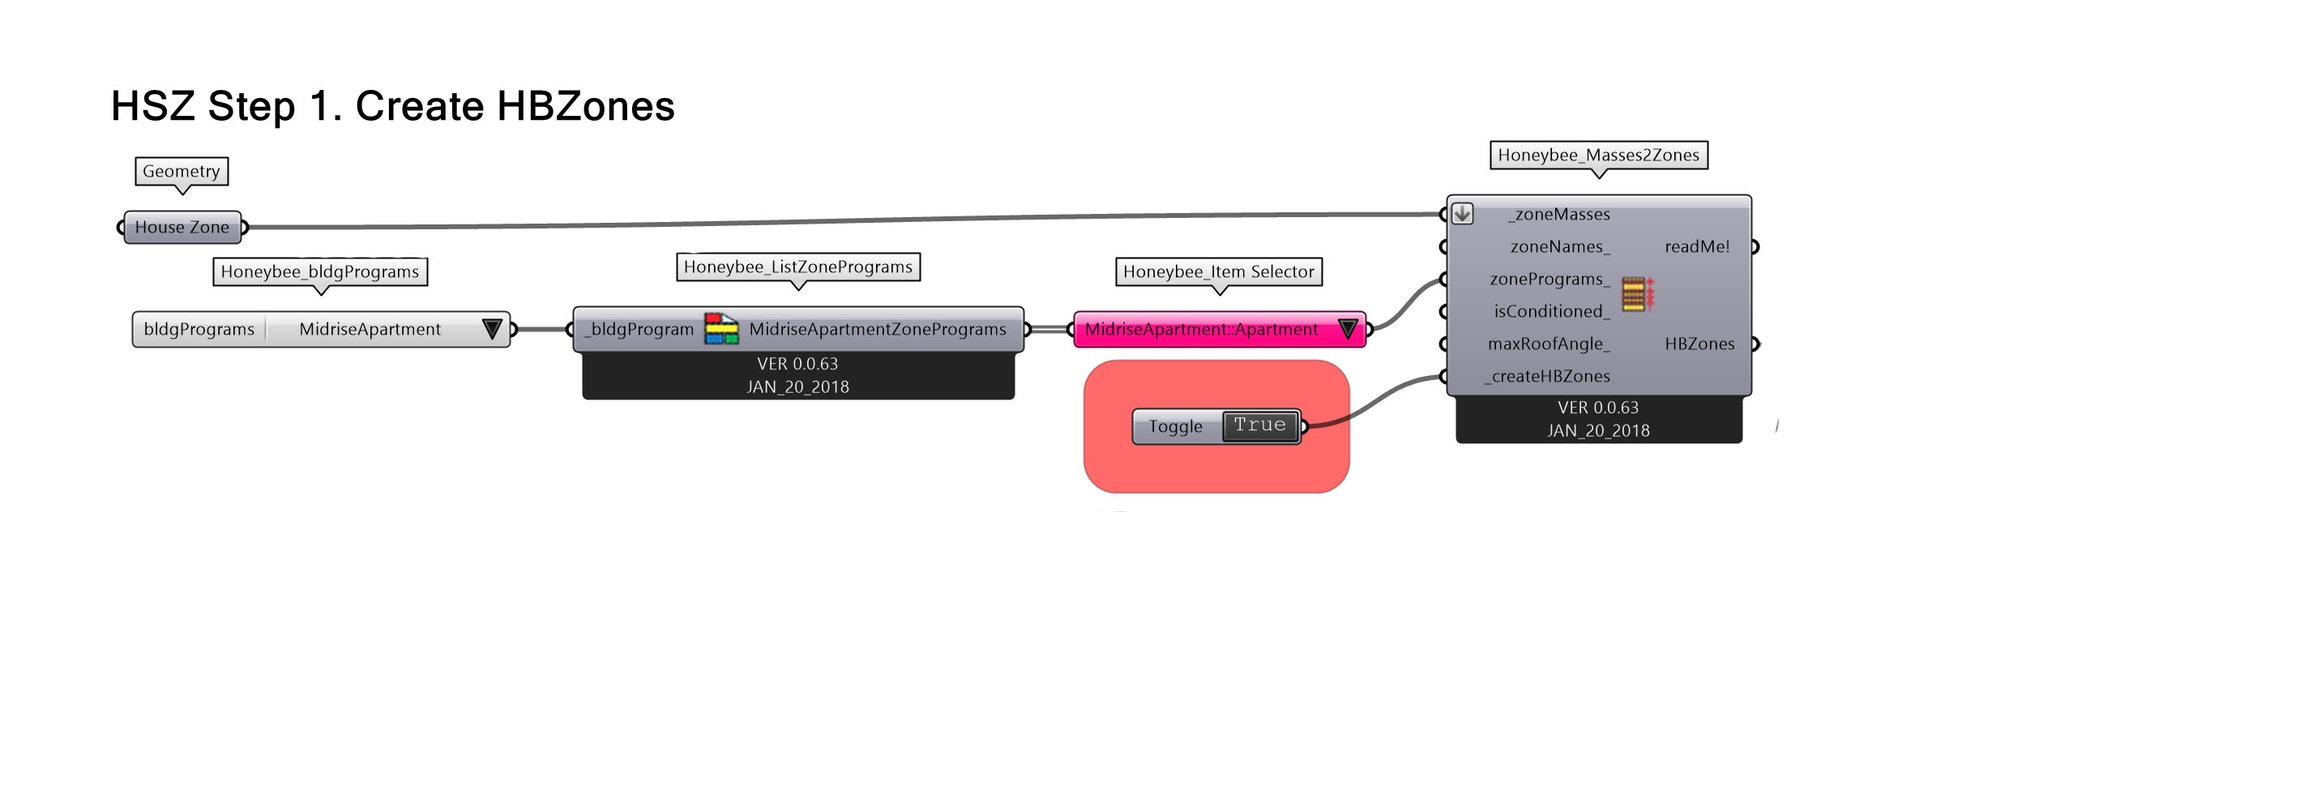
1.02 Honeybee has a library of default settings for Energy+ models that we can choose from. The Honeybee bldgPrograms component allows you to choose from a list of very generic programs. The Honeybee_ListZonePrograms offers a more detailed list of room types within each of these programs, that each correspond to a set of default settings and schedules for simulation. The Honeybee_Item Selector allows you to choose one of these sub-programs to connect to the Masses2Zones input for zoneProgram. 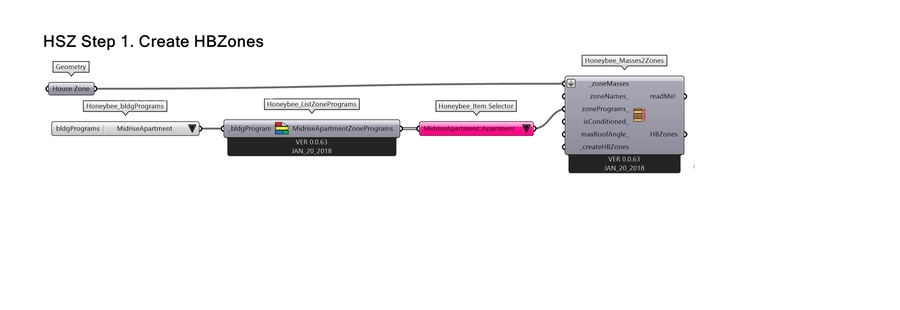
1.04 Once zones are created, apply windows as children to the zone. This is done using the Honeybee Add Glazing component (Honeybee-00-Honeybee_addHBGlz). 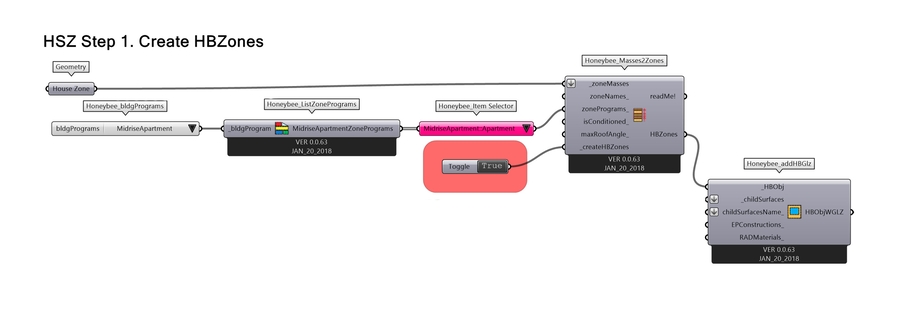
1.05 Create another Geometry component, rename it House Windows and load the following windows into the component. Review 0.07 for geometric requirements for modeling windows. 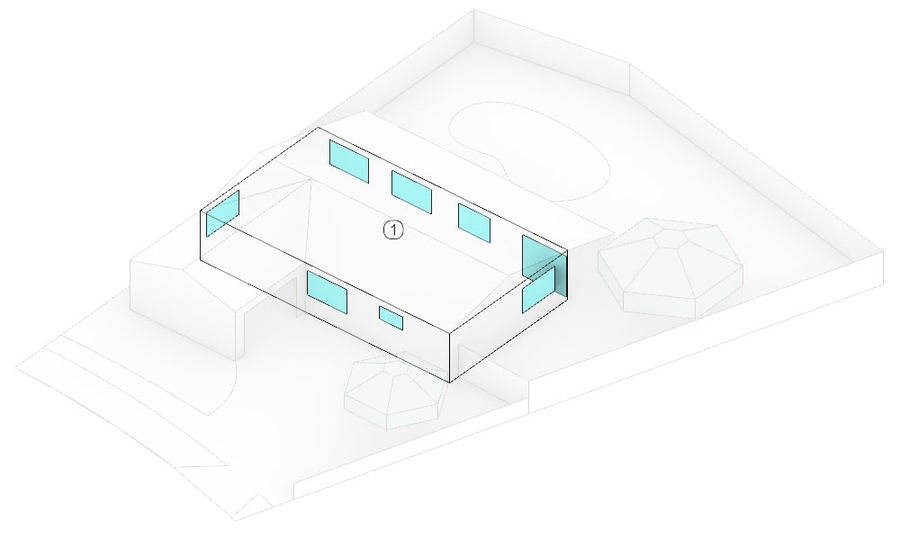
1.06 Then connect the House Windows geometry to the _childSurfacese input terminal of the Honeybee_HBaddglz component. As you can see from the other terminals on this component, it is also possible to provide a list of names for these windows and to provide construction details and Radiance Materials for the windows. 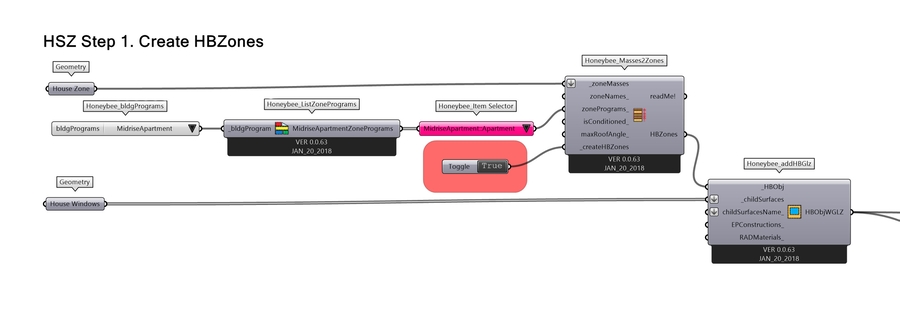
Last updated
Was this helpful?